This page provides step-by-step instructions for preparers of Expense Requests and PCard system transactions that require electronic upload of receipt images that have been shared with them via the Stanford eReceipts mobile app.
Attach eReceipts to Expense Request/PCard Transactions
Before You Start
- Learn about eReceipts mobile app, process and procedures on Fingate.
- Understand how eReceipts are captured and assigned to preparers.
- Receipts shared with preparers via eReceipts can be managed in Oracle using View and Manage eReceipts from the eReceipts link in the Resources section of the Expense Requests Home Page or PCard Home Page.
- As a reminder, this application does not replace paper receipt retention requirements that may be in place for your department.
- Enter ofweb.stanford.edu in the browser
- Click Login
- As prompted, log in using SUNet ID and password
- Select SU Expense Requests
Or - Select SU PCard
- Enter transaction details as you normally would. Refer to:
- How To Create Expense Report for SU Payees (steps 3-10)
Or - How To Verify PCard Transactions (steps 3-9)
- How To Create Expense Report for SU Payees (steps 3-10)
- At the final step, select Upload/View Attachments in PCard or Attach/View Receipts in Expense Report
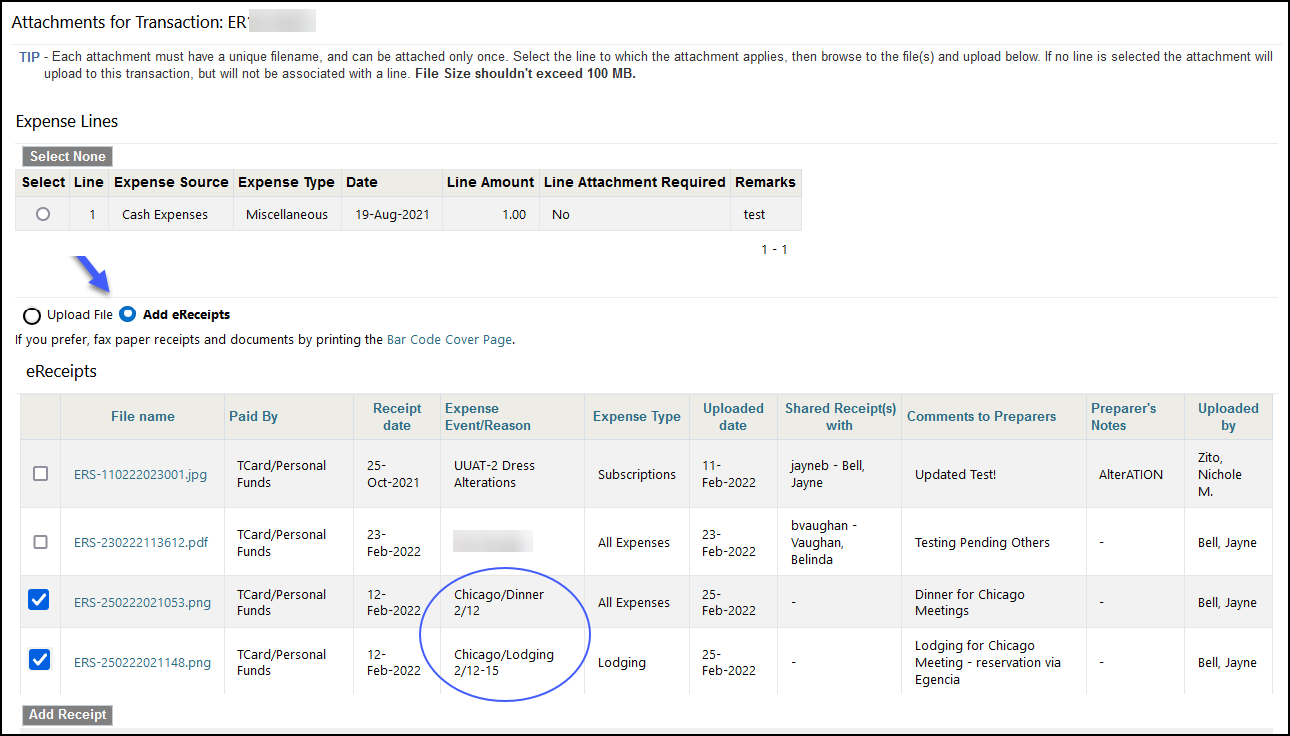
- Select Add eReceipts to view all eReceipts shared with you for that Category (PCard or TCard/Personal Funds)
- Select the correct receipt(s) associated with the transaction
- Click Add Receipt button at the bottom
An attachment for Expense Requests and PCard Transactions must be a legible copy of the entire receipt and clearly show:
- All text,
- Receipt Date,
- Location (when available),
- Vendor/Business Name and
- Entire Receipt (Additional screenshots may be needed to include all of a lengthy receipt.
Use the Event/Reason to capture the reason and add pg. 1, pg. 2, etc. to clarify.)
- Review the transaction for completeness
- Submit with attachments for financial approval
What Happens Next?
For more information:
- Learn about eReceipts
- Capture and Assign Receipts Using eReceipts
- View and Manage eReceipts that have been shared with you.