Stanford requires all suppliers/payees to have an active record in the university’s database before a purchase or payment can be made. To ensure payments are processed correctly and in a timely manner, new domestic company suppliers/payees must complete a one-time registration via Stanford’s Supplier and Payee Registry. The steps are provided below to complete the request.
Domestic individuals, foreign individuals and foreign company suppliers/payees must use Stanford’s Supplier and Payee Request Portal.
Complete a Request for Confidential Information in the Stanford Supplier and Payee Registry
Before You Start
Prepare the following to complete the request in the system:
- Tax reporting info (e.g., Social Security Number (SSN), Individual Taxpayer Identification Number (ITIN) , or Employer Identification Number (EIN)
- Bank info (e.g., bank routing and account number)
- Supporting documents to upload
Save for Later
Registration steps are displayed at the top of each section of the registration process. Steps 1 through 8 must be completed before a record can be created.
If the registration process cannot be completed in one session, select Save for Later to save your progress. All tax identification information is automatically deleted and the system sends a link to the contact created on the Company Details screen. When the registration process resumes, tax identification information must be provided again.
- Select Supplier and Payee Registry found in the Action Required section of the registration invitation.
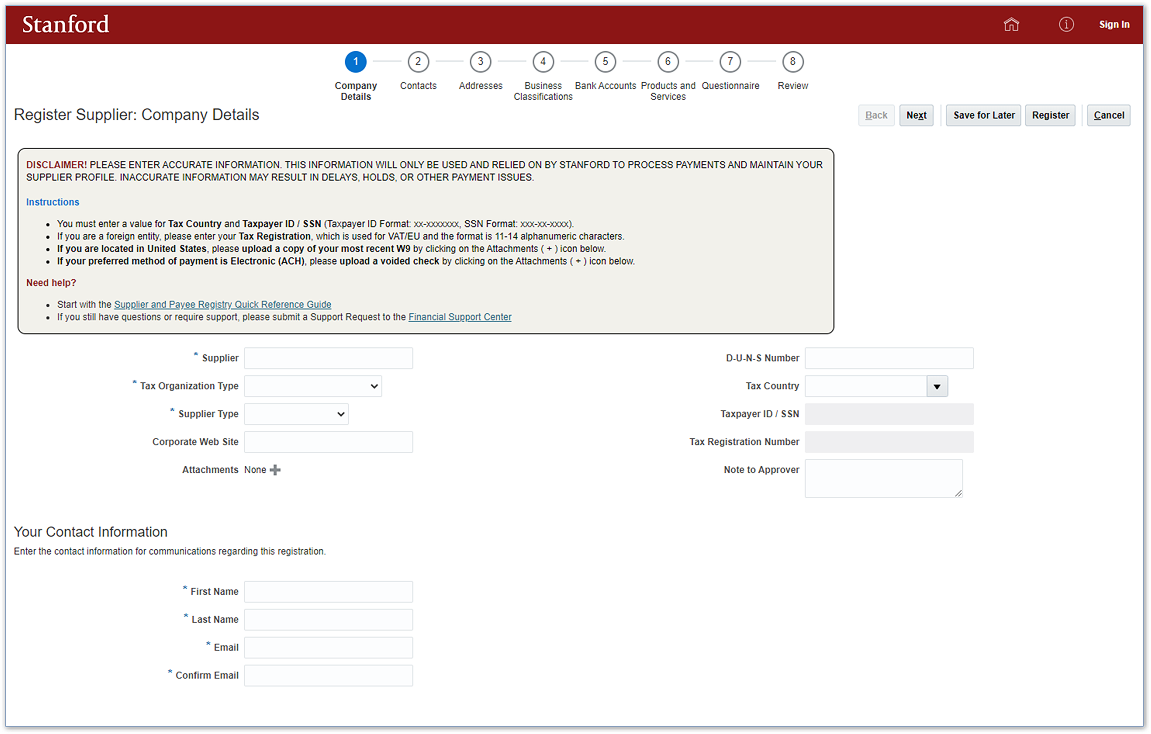
Company Details
- Enter the legal name of your company in the Supplier field
- Select the Tax Organization Type of your company
- Select the Supplier Type of your company
- Provide the address of the official website of your company
- Select Attachments icon (+)
- Attach your W9 (required)
- If your preferred payment method is ACH, attach a voided check or documentation from your bank showing account number, routing number and account name
- Provide the D-U-N-S Number for your company if available
- Select the Tax Country where your company is registered
- Provide the EIN/TIN (employer or tax identification number) for your company
Your Contact Information
- Provide the first and last name of the person that will function as a point of contact for communications regarding your supplier profile
- Enter and confirm the email address of the contact
The contact created in the previous step is listed here and has Administrative Contact and Request User Account settings enabled.
If possible, we recommend your supplier profile include at least two contacts with these settings enabled.
- Administrative Contact functions as a point of contact for communications regarding this registration and your supplier profile (once approved).
- Request User Account contacts must have a user account in order to manage your supplier profile.
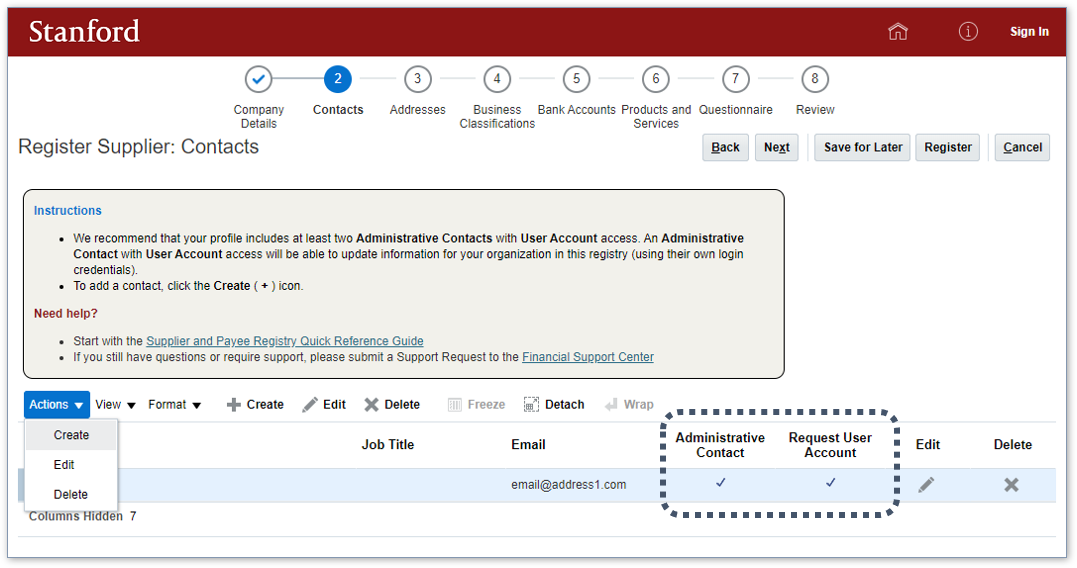
- To add a contact, select Create from the Actions drop-down menu
- Complete all required fields and provide a phone number
- By default, selecting the Request user account checkbox will cause the Roles table to open. The university does not use this feature. Please ignore.
- You can Create Another contact or select OK to close the Create Contact window
Addresses are needed for purchase orders and supplier invoices.
- To add an address, select Create from the Actions menu
- Complete the required fields
- Provide a short description for the address in the Address Name field (e.g., main, hq, ordering) During the approval process, the system will modify the description you provided to fit Stanford’s naming convention.
- If Ordering and Remit To email addresses are different
- Select the Ordering checkbox
- Return to the Company Details page
- Provide the Remit To address in the Note to Approver Field
- Click Create Another address or select OK to close the Create Address window
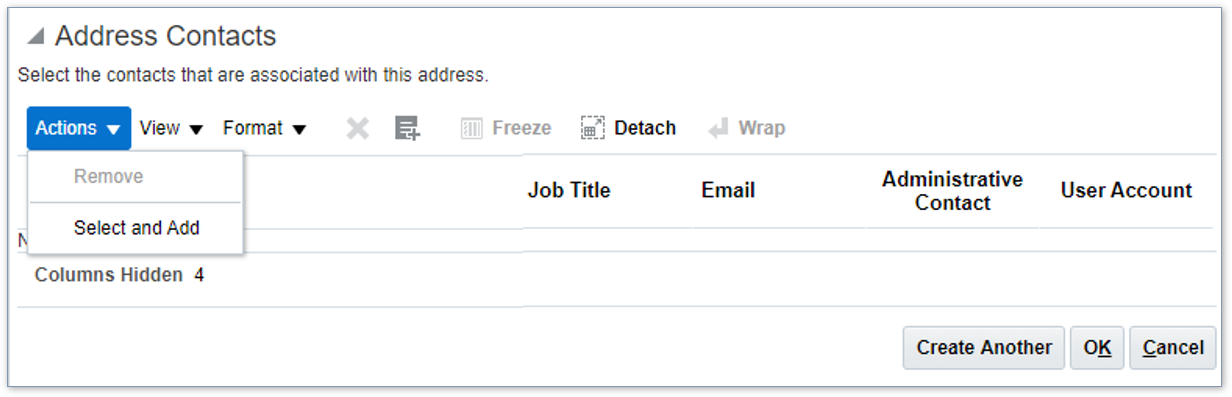
Assign a Contact to an Address
All procurement sites must have at least one contact assigned to them.
- Choose Select and Add from the Actions menu
- Search using first name or select contact from the list (if displayed)
- Select Apply to search for and assign more contacts to the address or select OK to assign the contact and close the Select and Add window
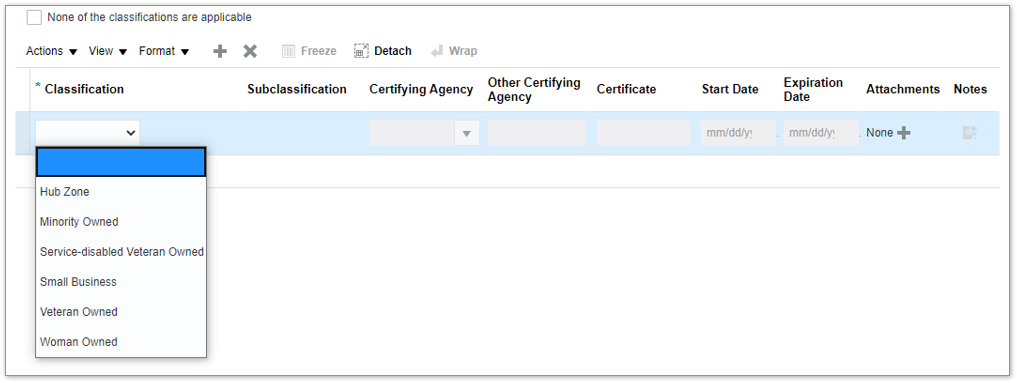
- Select Add Row from the Actions drop-down menu if your business is classified as:
- HubZone
- Minority Owned
- Service-disabled Veteran Owned
- Small Business
- Veteran Owned
- Woman Owned
Otherwise, select the None of the classifications are applicable checkbox.
- Select the Classification that applies to your business
- Complete additional fields as indicated
- Select Attachments icon (+) to attach documents
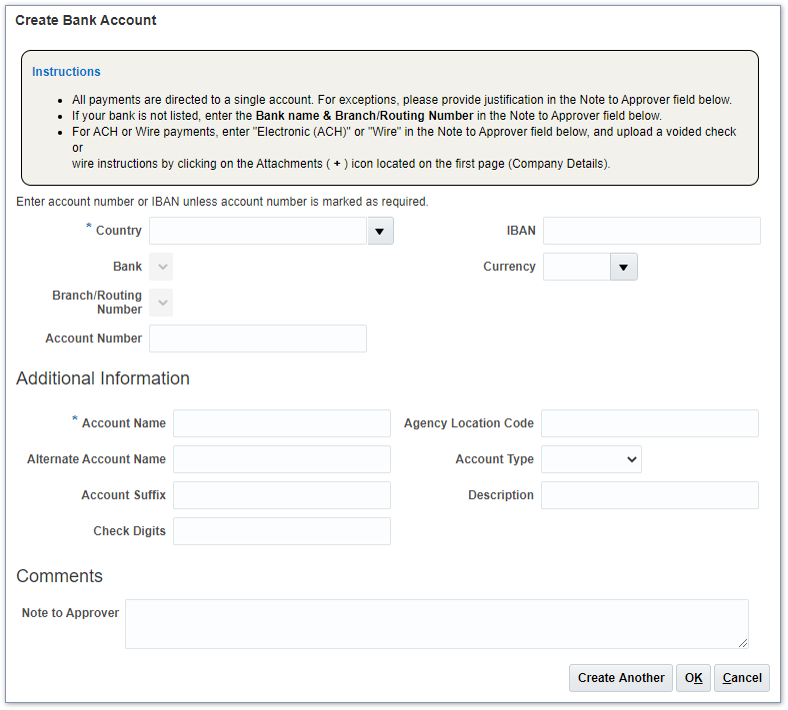
If you do not add a bank account, your default payment method will be via check.
- To add a bank account, choose Select and Add from the Actions menu
- Complete the required fields
- For ACH or wire payments:
- Enter ACH in the Note to Approver field
- Ensure a voided check or documentation from your bank showing account number, routing number and account name has been attached on the Company Details page
- If your bank is not listed, enter the bank name and branch/routing number in the Note to Approver field
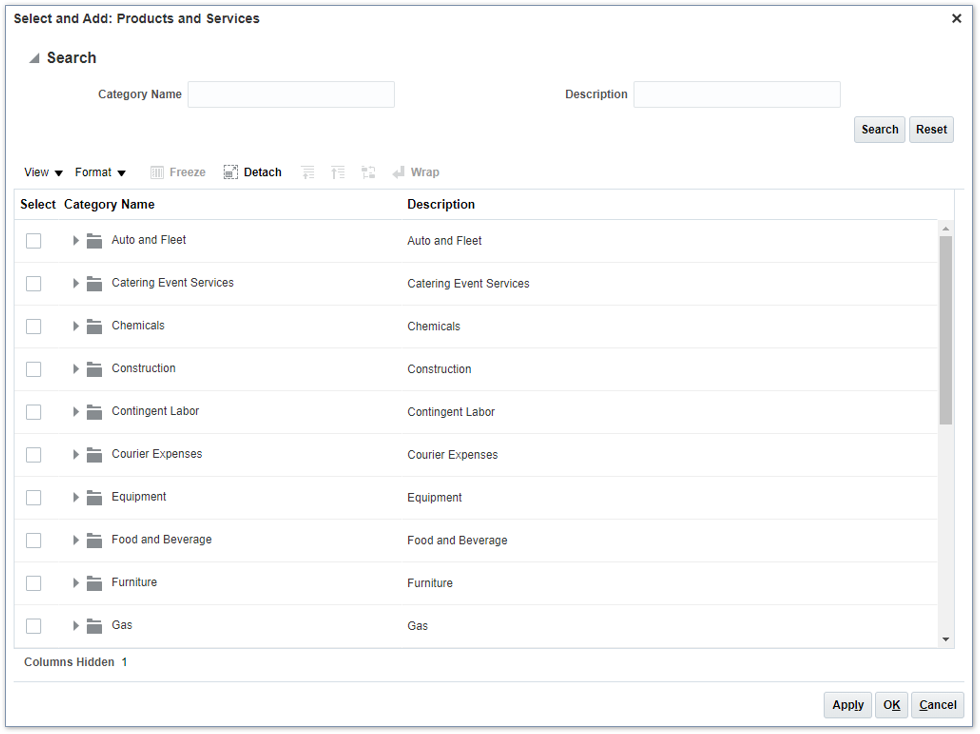
- Choose Select and Add from the Actions menu to identify the products and services you will be providing
- Select the checkbox next to all applicable product and service categories
- Select OK when you are done
The questionnaire consists of 17 questions. Information gathered in the questionnaire will only be used and relied upon by Stanford to process payments and maintain your supplier profile. Inaccurate information may result in delays, holds or other payment issues.
- Depending on your answer, you may be asked to enter a comment in a text field or attach supporting documentation.
- Previous Section and Next Section at the bottom of the questionnaire are disabled.
- Scroll up and select Next to go to the next step.
- Scroll through the review summary and check to ensure the information provided is accurate and complete
- Select Register at the top of the window to validate and submit your information The system will perform a validation check and notify you if any errors are detected.
- Revisit pages where the system detected errors (if any)
- Select Register once you have resolved all errors
If the system does not detect any errors, a confirmation window will pop up. - Select OK to close the confirmation pop up and exit the registry
- Information is routed to Supplier Enablement for review. If additional information or documentation is required, a Supplier Enablement coordinator sends the supplier/payee a follow-up request. Requesters receive an automatic notification when the record is active and available for use.
Registry invitations are inactivated if not returned within 30 days. To reactivate a request after 30 days, contact the Financial Support Center.